Swift5.1.3 Xcode11.3.1 SwiftUI
- Install darkmode extensions into your app
- Adjust the color of dark settings
- good for your eyes and power of iPhone
* Here is the highlight of YouTube tutorial.
OEL (organic electro-luminescence) was thought to save some power of iPhone
more than LCD (Liquid Crystal Display). But, several recent reports showed
it is opposite actually.
How about your iPhone? To tell the truth, I had iPhone6s and iPhoneX and
iPhone6s seems to be longer lasting than iPhoneX.
Anyway, it is worth looking at how to save the power of iPhone. Darkmode
is one of the ways to prevent unnecessary power consuming.
Besides, it is good for your eyes. Dark color is so gentle not only for
power but also for your sight.
So, let me tell you how to create darkmode on web browser for these purposes.
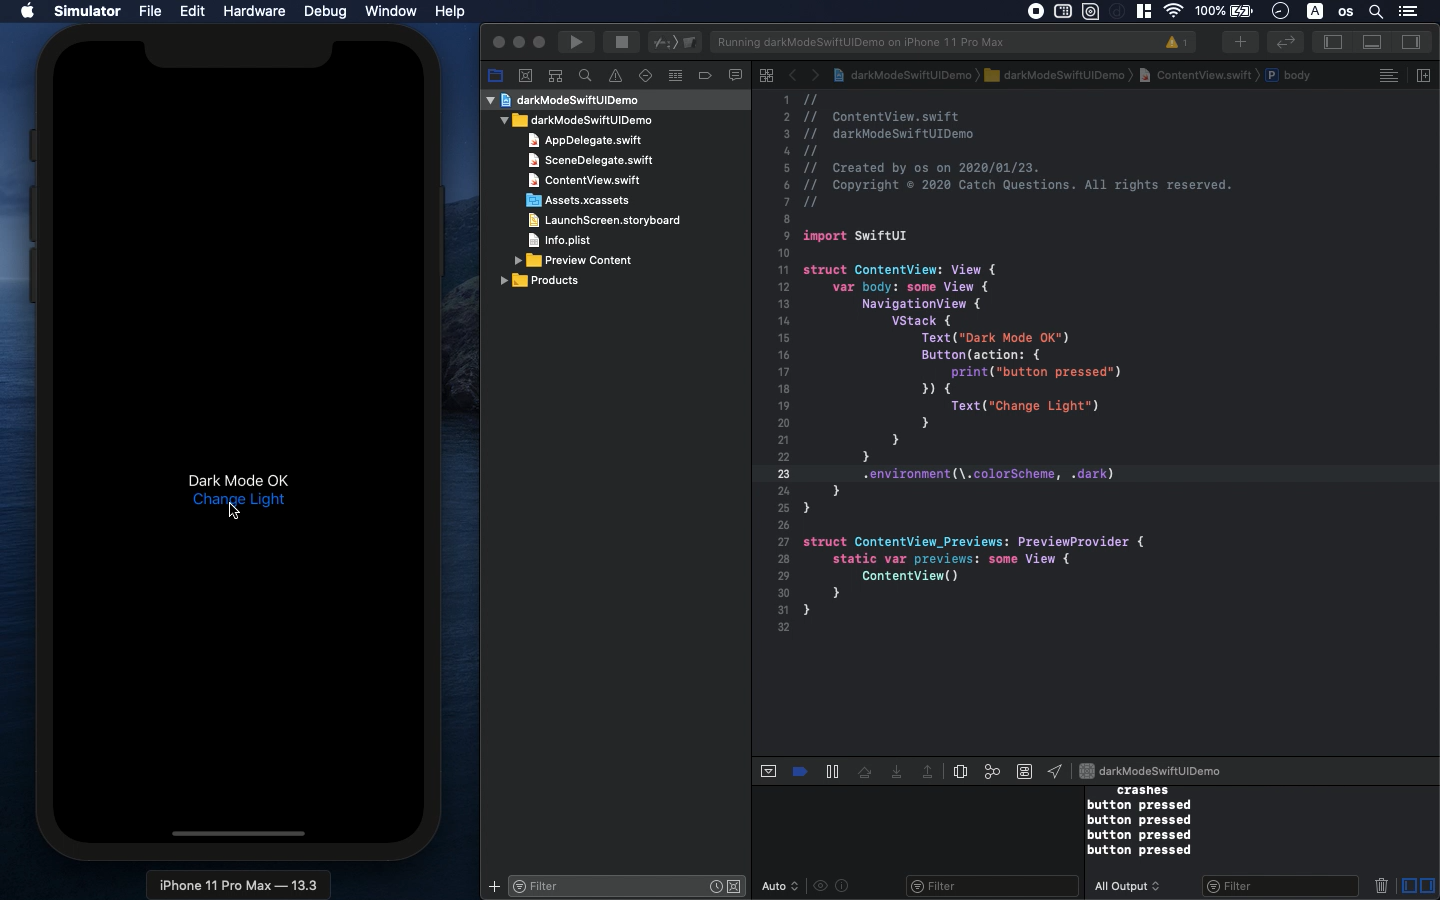
First, let's see how the ordinary function work on SwiftUI. You need to
use the following property.
.environment(\.colorScheme, .dark)
Please put this on NavigationView. It's so simple to create darkmode in
your app. To compare it with ordinary mode, please change it like this.
.environment(\.colorScheme, .light)
You can confirm the difference with this.
But, as for the web browser, it will not work because we have to use WebView
which does not work with the function of darkmode.
Please refer to my previous YouTube seminar #4 to handle WebView. I will
skip the detailed explanation.
struct WebView : UIViewRepresentable {
var url: URL
func makeUIView(context: Context) -> WKWebView {
return WKWebView()
}
func updateUIView(_ uiView: WKWebView, context: Context) {
let request = URLRequest(url: url)
uiView.load(request)
}
}
You can assign the url of favorite web page to the variable as you want.
Next, you need set the follwoing rectangle.
Rectangle()
.foregroundColor(Color.black)
.opacity(self.opDoub)
Yes, it is the point of dark mode. Does it sound simple? For darkmode,
you have to think the following two things: color and contrast.
You should change them depending on the web site you visit. If you can
add some function to control them dynamically, it will be more convenient.
Add more functions as you want with my code.
Let me show you the code as a whole.
@State var urlString:String = "https://catch-questions.com/english"
@State var opDoub = 0.0
@State var iFbool = false
var body: some View {
VStack {
Text("Dark Mode OK")
Button(action: {
print("hello")
self.iFbool.toggle()
if self.iFbool == true {
self.opDoub = 0.3
} else {
self.opDoub = 0.0
}
}) {
Text("Change Light")
}
ZStack{
WebView(url: URL(string: urlString)!)
Rectangle()
.foregroundColor(Color.black)
.opacity(self.opDoub)
}
}
With the button action, Rectangle() will cover WebView() with a transparent
dark sheet. You have to place the Rectangle() under WebView() in ZStack
to make the darkmode possible.
To get the source code, check the comment of my YouTube
Back to Table List
