Swift5.1.2 Xcode11.2.1 Storyboard
- Alert Messageの表示の仕方
- ActionSheetはiPadで不具合を起こす
- Buttonから画面遷移で新しいViewControllerへの受け渡しの方法
「以下は動画のハイライトです。」
前回のSwiftUIでAlert, ActionSheetおよびSheetの動作について解説いたしました。今回はStoryboardでこれらがどうなるか見ていきたいと思います。
なおStoryboardではSheetと同様の動きをするものとして新しいViewControllerを作成し画面遷移させる方法がこれと同様のため本稿でもこの動きを便宜上Sheetとさせていただきます。
ではStoryboardで三つのボタンを作成した後、まずAlertの動きとしてUIAlertController.Style.alertの実装をします。
@IBAction func alertAct(_ sender: Any) {
let alert = UIAlertController (
title: "ここがタイトル",
message: "ここがメッセージ",
preferredStyle: UIAlertController.Style.alert)
alert.addAction(
UIAlertAction(
title: "ボタン1",
style: UIAlertAction.Style.default,
handler: {action in
print("alert ボタン1")})
)
alert.addAction(
UIAlertAction(
title: "ボタン2",
style: UIAlertAction.Style.default,
handler: {action in
print("alert ボタン2")})
)
alert.addAction(
UIAlertAction(
title: "キャンセル",
style: UIAlertAction.Style.destructive,
handler: {action in
print("alert キャンセル")})
)
self.present (alert,
animated: true,
completion: {
print("アラートが表示しました")
})
}
Storyboardではalert.addActionを増やすことで実は無限にボタンを増やすことができます。この点はSwiftUIと違って使いやすいところですね。
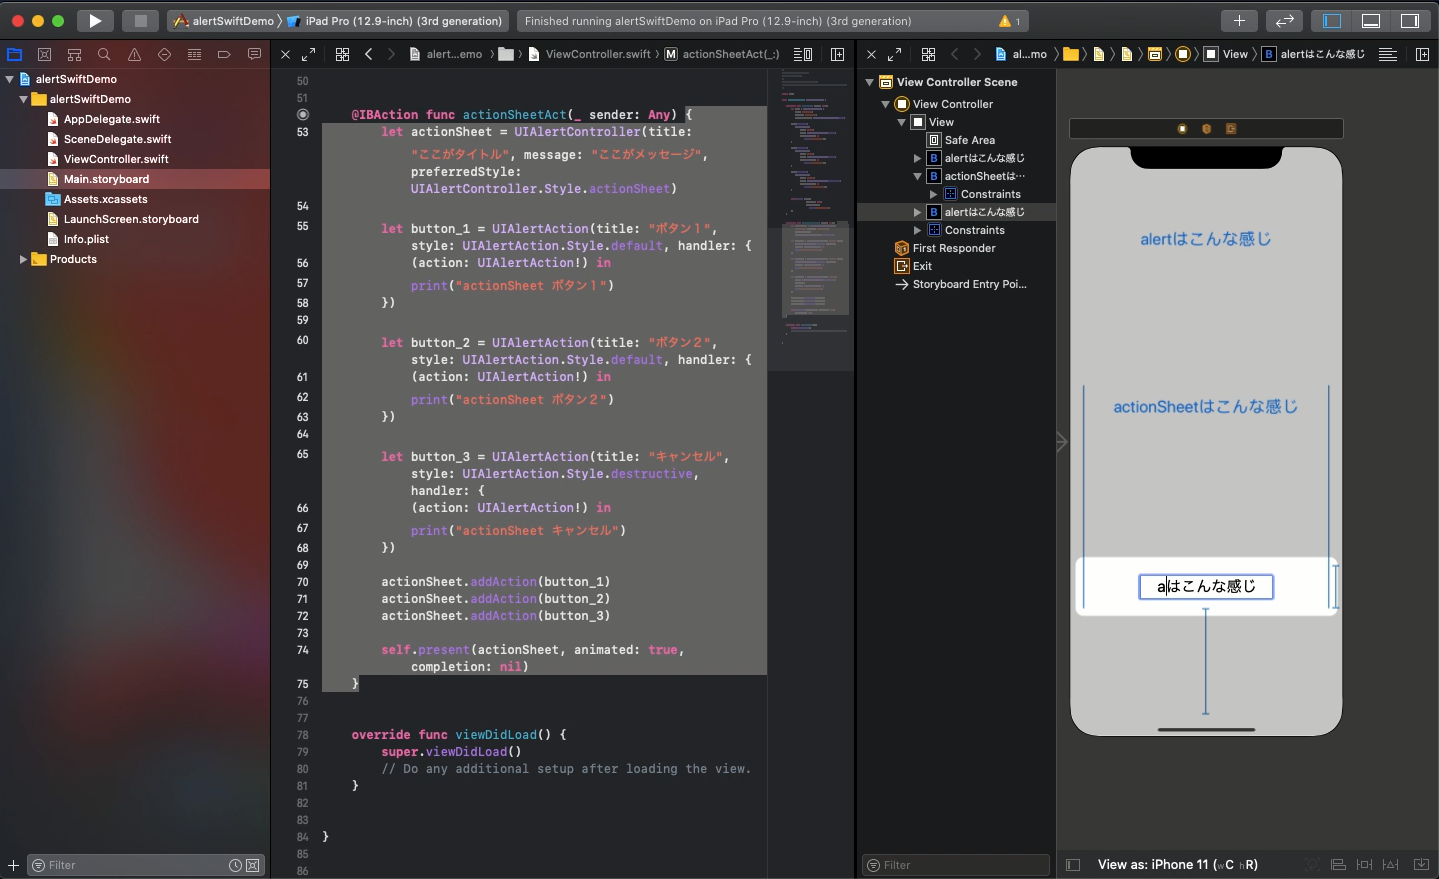
次にActionSheetとしてUIAlertController.Style.actionSheetを実装します。
@IBAction func actionSheetAct(_ sender: Any) {
let actionSheet = UIAlertController(title: "ここがタイトル", message:
"ここがメッセージ", preferredStyle: UIAlertController.Style.actionSheet)
let button_1 = UIAlertAction(title: "ボタン1", style: UIAlertAction.Style.default,
handler: {
(action: UIAlertAction!) in
print("actionSheet ボタン1")
})
let button_2 = UIAlertAction(title: "ボタン2", style: UIAlertAction.Style.default,
handler: {
(action: UIAlertAction!) in
print("actionSheet ボタン2")
})
let button_3 = UIAlertAction(title: "キャンセル", style: UIAlertAction.Style.destructive,
handler: {
(action: UIAlertAction!) in
print("actionSheet キャンセル")
})
actionSheet.addAction(button_1)
actionSheet.addAction(button_2)
actionSheet.addAction(button_3)
self.present(actionSheet, animated: true, completion: nil)
}
ActionSheetはiPhoneの下方からボタンが出現するぐらいの違いでAlertとほぼ変わりありません。これをiPadでビルドするとクラッシュします。Apple公式のバグのようですが使わないに越したことはありませんね。使った方が良いメリットがStoryboardでは見出せません。
それでは三つ目のSheetの画面遷移について解説します。これは遷移先でボタンの配置や文字など好きなようにカスタマイズできるのでデザインを気にする方にはお勧めです。
ただ、設定が結構複雑です。
まず、Main.storyboardへButtonなどを増やす要領でViewControllerを追加してください。そしてViewController.swiftを新規で作成します。名前はiViewController.swiftとでもしましょう。これを作成したら「戻る」Buttonを実装し、Labelに適当な文字を記述します。(ここの箇所はYouTubeの動画をご覧いただけると一発でわかるので動画をご査収ください。)
そして戻るButtonには以下のfuncも実装してください。遷移先から元の画面に戻るためのものです。
self.dismiss(animated: true, completion: nil)
以上ができましたらビルドをして確認してください。特にiPadのシミュレーターでActionSheetがクラッシュするところもご確認いただけると幸いです。
ソースコードはYouTubeのコメント欄に記載します。


