Swift5.1.3 Xcode11.3.1 SwiftUI
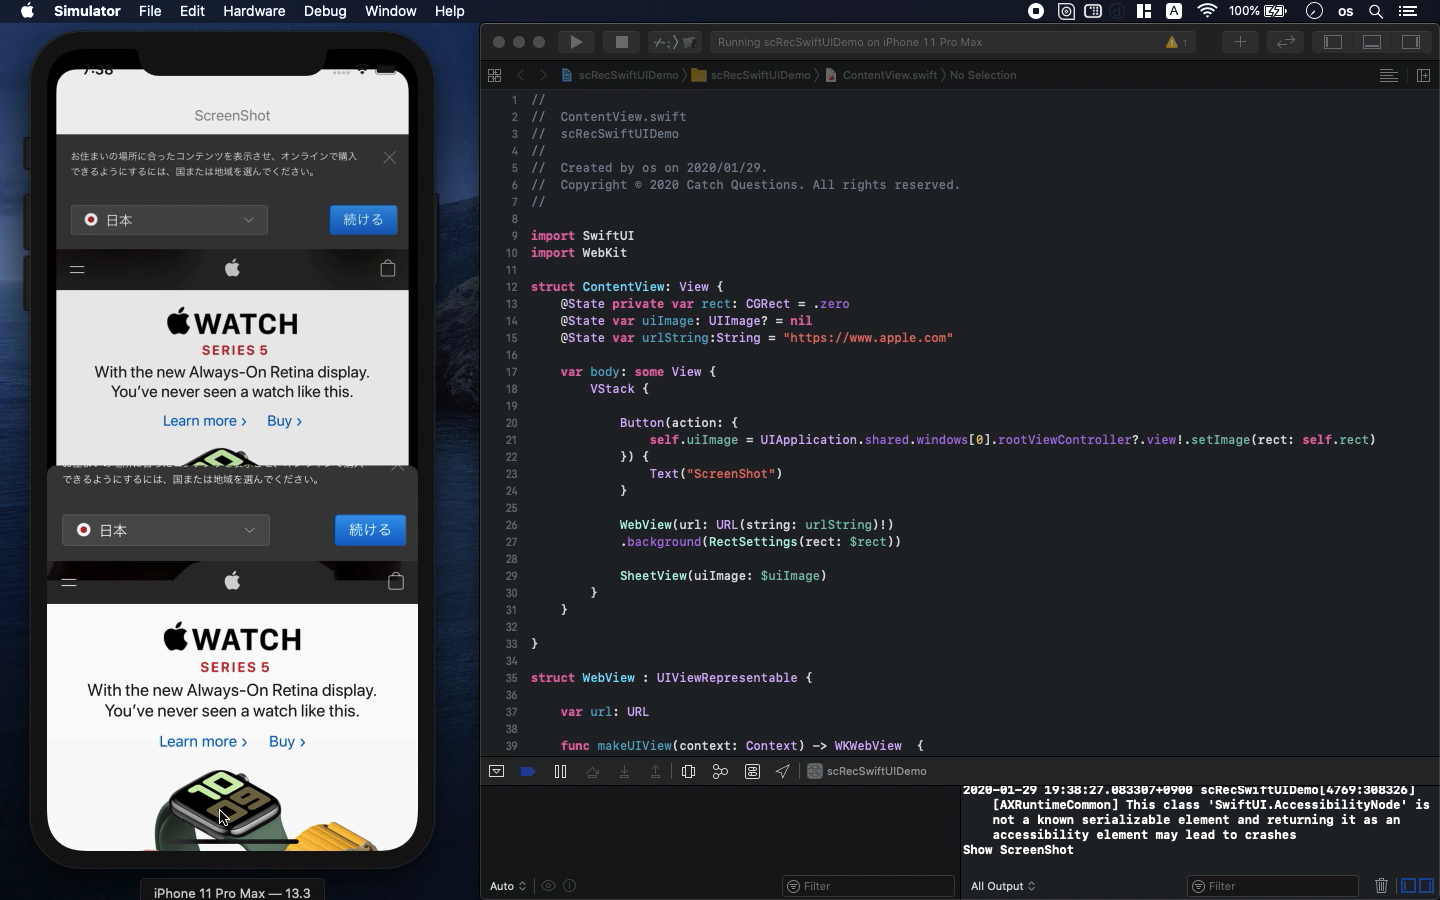
- Hack screenshot to grab any screen web photo
- You can create screen capture on your app
- UIImage of Sheet view works on SwiftUI
* Here is the highlight of YouTube tutorial.
Can't take screenshot? Then, you should create some app to make it possible.
You can develop screen capture with my code and save any web record as
you want.
Let me show you how to create it with SwiftUI.
I will skip the explanations of WebKit (my YouTube #4) and SheetView (my
YouTube #7) so please check them before you watch this tutorial.
First, you need to put WebView into your code like this.
struct WebView : UIViewRepresentable {
var url: URL
func makeUIView(context: Context) -> WKWebView {
return WKWebView()
}
func updateUIView(_ uiView: WKWebView, context: Context) {
let request = URLRequest(url: url)
uiView.load(request)
}
}
The parameter of url is the web site you would like to visit. Let me use
my website for example.
@State var urlString:String = "https://catch-questions.com/english/"
WebView(url: URL(string: urlString)!)
Next, let's set SheetView. Please ignore uiImage for now, which will work
as screen capture later.
struct SheetView: View {
@State private var showTrigger = false
@Binding var uiImage: UIImage?
var body: some View {
VStack {
Button("Check Image") {
self.showTrigger = true
}
}.sheet(isPresented: $showTrigger, onDismiss: {
print("Show ScreenShot")
}) {
ScreenShot(uiImage: self.$uiImage)
}
}
}
struct ScreenShot: View {
@Environment(\.presentationMode) var presentation
@Binding var uiImage: UIImage?
var body: some View {
VStack {
if uiImage != nil {
VStack {
Image(uiImage: self.uiImage!)
}
.background(Color.green)
.frame(width: 500, height: 700)
}
Spacer()
Button("Close") {
self.presentation.wrappedValue.dismiss()
}
Spacer()
}.font(.custom("SFProText-Bold", size: 25))
}
}
You can call the SheetView with the designated button, named "Show
ScreenShot".
Now, let's build it after import WebKit.
import WebKit
@State var urlString:String = "https://catch-questions.com/english/"
@State var uiImage: UIImage? = nil
var body: some View {
VStack {
WebView(url: URL(string: urlString)!)
SheetView(uiImage: $uiImage)
}
}
After you confirm the movement on Simulator, it's time for screenshot.
Put Struct and extension under the code above.
struct RectSettings: View {
@Binding var rect: CGRect
var body: some View {
GeometryReader { geometry in
self.setView(proxy: geometry)
}
}
func setView(proxy: GeometryProxy) -> some View {
DispatchQueue.main.async {
self.rect = proxy.frame(in: .global)
}
return Rectangle().fill(Color.clear)
}
}
extension UIView {
func setImage(rect: CGRect) -> UIImage {
let renderer = UIGraphicsImageRenderer(bounds: rect)
return renderer.image { rendererContext in
layer.render(in: rendererContext.cgContext)
}
}
}
The struct is for getting the area of web browser in rect. Based on the
rect information, you can create UIImage from UIView with the function
of extension.
The UIImage data can be passed via the variable named "uiImage".
In this way, after you start the app, press the button of "ScreenShot"
to take screenshot and confirm the image on SheetView with the button of
"Check Image".
Unless you kill this app, the app will keep the image data at the background
mode.
Please arrange my code as you want.
To get the source code, check the comment of my YouTube
Back to Table List
