Swift5.1.3 Xcode11.3 SwiftUI
- import webkit and handle favorite url
- how to create web browser
- manage and switch bookmarks
* Here is the highlight of YouTube tutorial.
Why I started to learn Swift was that I wanted to create vocab list app
by myself. It may sounds very difficult if you are beginner. But, don't
worry. Even a strange Japanese who cannot speak English well like me could
create it. You can do it.
First, you need to prepare CSV file for the vocabulary note book. Numbers
or Excel file may have some unexpected line feed codes so please be careful
when use it. The safer way is to use terminal to create csv file by useing
the follwoing code.
cd Desktop;
echo apple,リンゴ >> file.csv;
Please use loop command if your vocab list is big with this code. Let me
leave the way to add CSV file on Xcode for YouTube video.
The necessary variables are as follows;
@State var csvArr = [String]()
@State var fluits = [String]()
@State var WordBook:Dictionary<String,String> = [:]
@State var selection:String = ""
@State var showPicker = false
The following usual picker is also used.
struct SinglePicker: View {
let fluits: [String]
@Binding var selection:String
var body: some View {
GeometryReader { geometry in
Picker(" WordBook", selection: self.$selection) {
ForEach(0..<self.fluits.count) { row in
Text(verbatim: self.fluits[row]).tag(self.fluits[row])
}
}
}
}
}
After you start the app, the following code appending on VStack will be
worked.
.onAppear(
perform: {
let url = Bundle.main.path(forResource: "file", ofType: "csv")
do {
var csvString = try String(contentsOfFile: url!, encoding: String.Encoding.utf8)
self.csvArr = csvString.components(separatedBy: .newlines)
self.csvArr.removeLast()
} catch let error as NSError {
print("Error: \(error)")
return
}
for sstr in self.csvArr {
let arrayPart = sstr.components(separatedBy: ",")
self.fluits.append(arrayPart[0])
self.WordBook[arrayPart[0]] = arrayPart[1]
}
}
)
The CSV file will be read one line by one and csvString will become Array.
The each element has comma so you need to separate it with it.
let arrayPart = sstr.components(separatedBy: ",")
The former part will be used for the other array named "fluits".
On the other hand, the latter part will be used for the dictionary with
the fluit key.
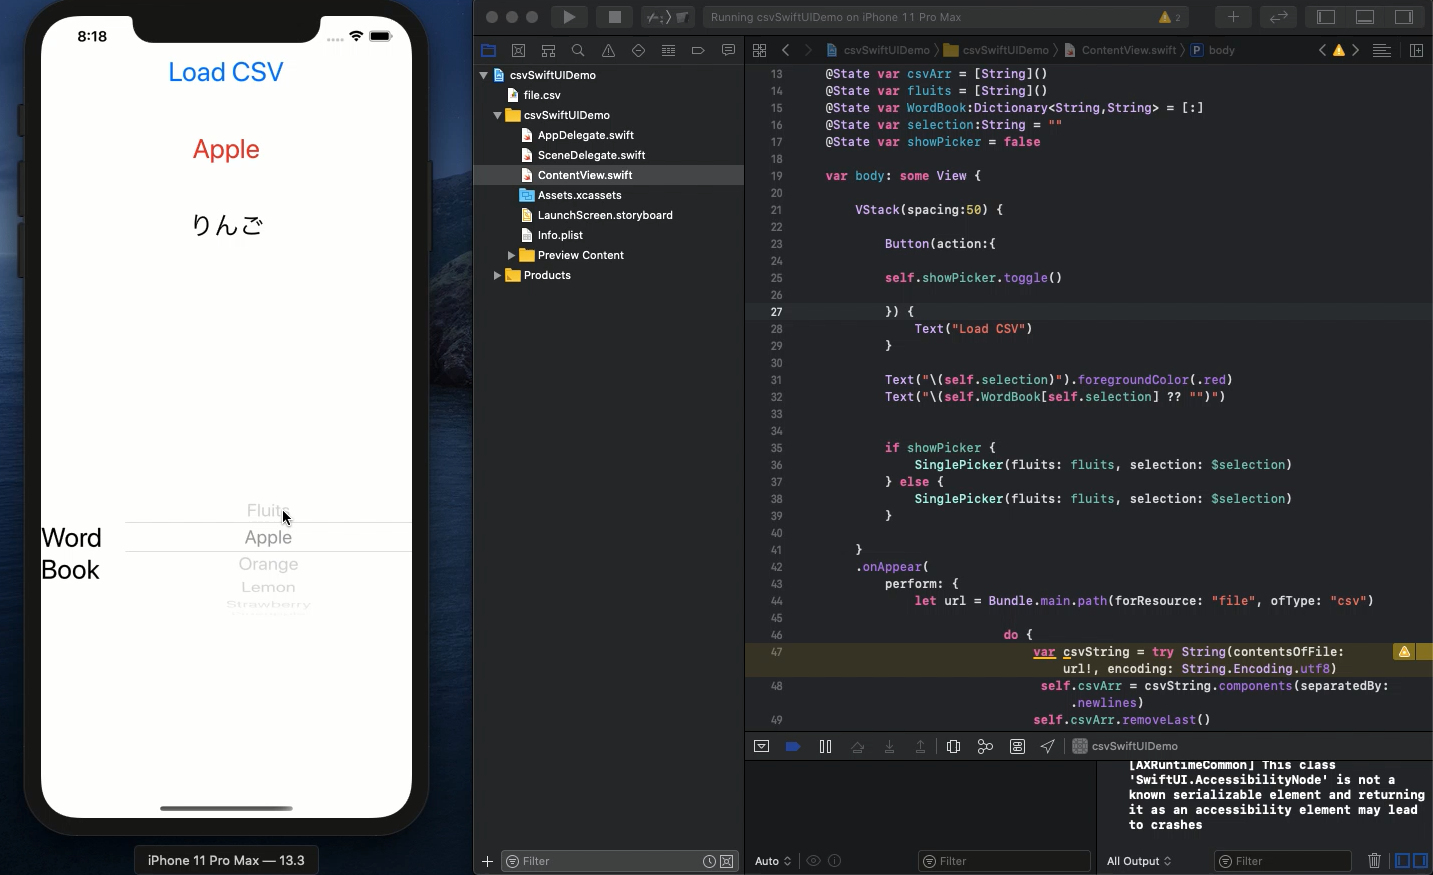
By using this data, place the following code in ContentView.
Button(action:{
self.showPicker.toggle()
}) {
Text("Load CSV")
}
Text("\(self.selection)").foregroundColor(.red)
Text("\(self.WordBook[self.selection] ?? "")")
if showPicker {
SinglePicker(fluits: fluits, selection: $selection)
} else {
SinglePicker(fluits: fluits, selection: $selection)
}
The most difficult part was to understand how SinglePicker() acts. Before
reading CSV file, SinglePicker() is created in ContentView. And, I could
not refresh the picker so easily. As far as I know, there was no way to
reload Picker such as reloadAllComponents() of UIPIckerView.
My solution was to create two SinglePicker()s and switch them when hitting
button. In this way, you can use the loaded csv data in Xcode.
If you know the smarter way than this, I hope you to let me know.
To get the source code, check the comment of my YouTube
Back to Table List
